The One Ring
http://ww.one-ring.co.uk/

Highlighting tips...
http://ww.one-ring.co.uk/viewtopic.php?f=100&t=24855
Page 1 of 1

Author:  Thermo [ Mon Jan 14, 2013 1:49 pm ]
Post subject:  Highlighting tips...

So, after being pretty pleased with the start of my grey company with Halbarad (after being primed, base coated and initial shading, I made my first attempt of highlighting and was not pleased at all! Particularly with the metallics.

Any tips or guides on how I should take this on? Not just metallics but highlighting generally. Much appreciated team!

Author:  Monotone_Matt [ Mon Jan 14, 2013 2:26 pm ]
Post subject:  Re: Highlighting tips...

I go about it in three steps, which can look pretty convincing. Obviously if you want very very realistic pieces you can keep highlighting till the cows come home.

What I do:

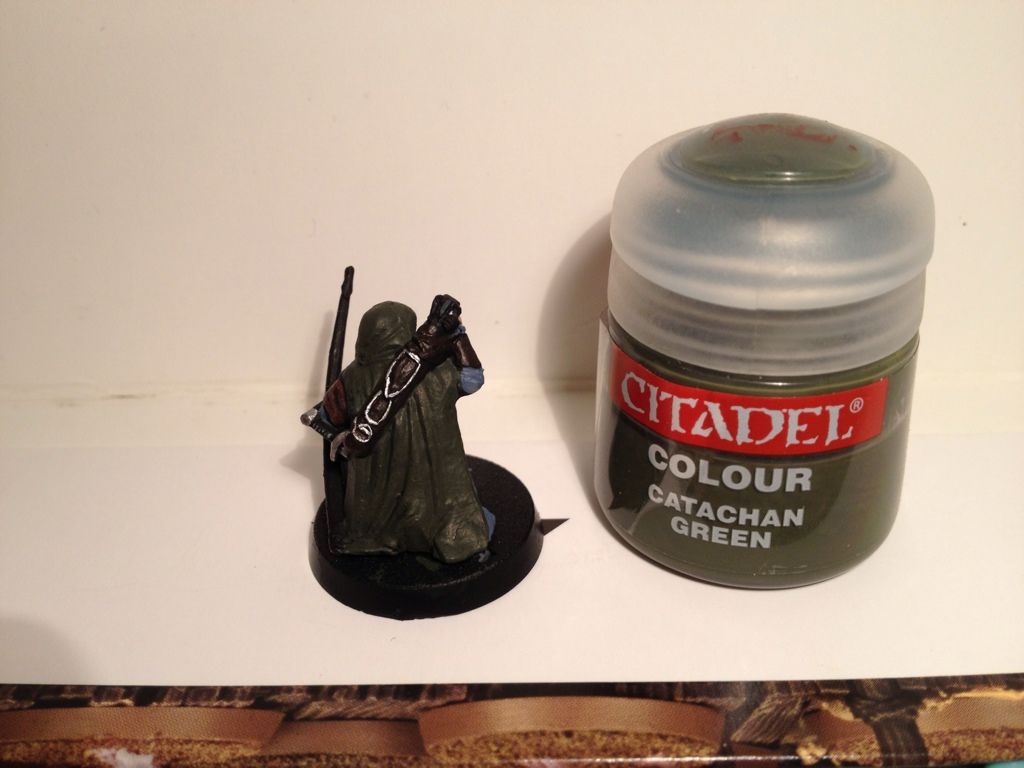
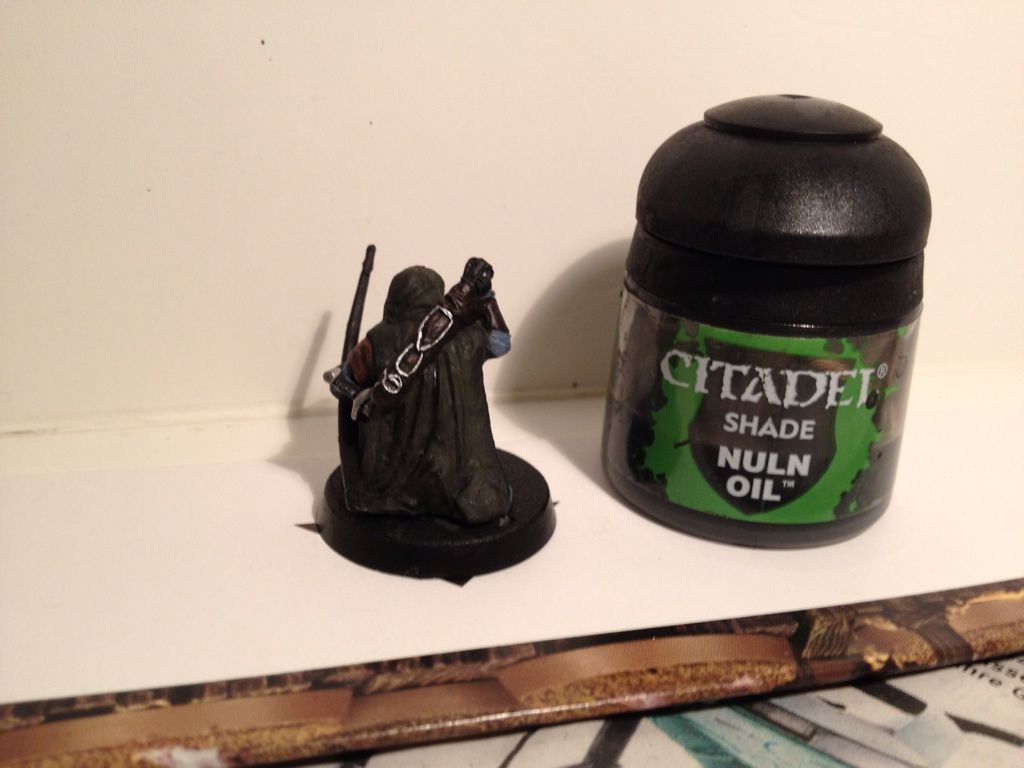
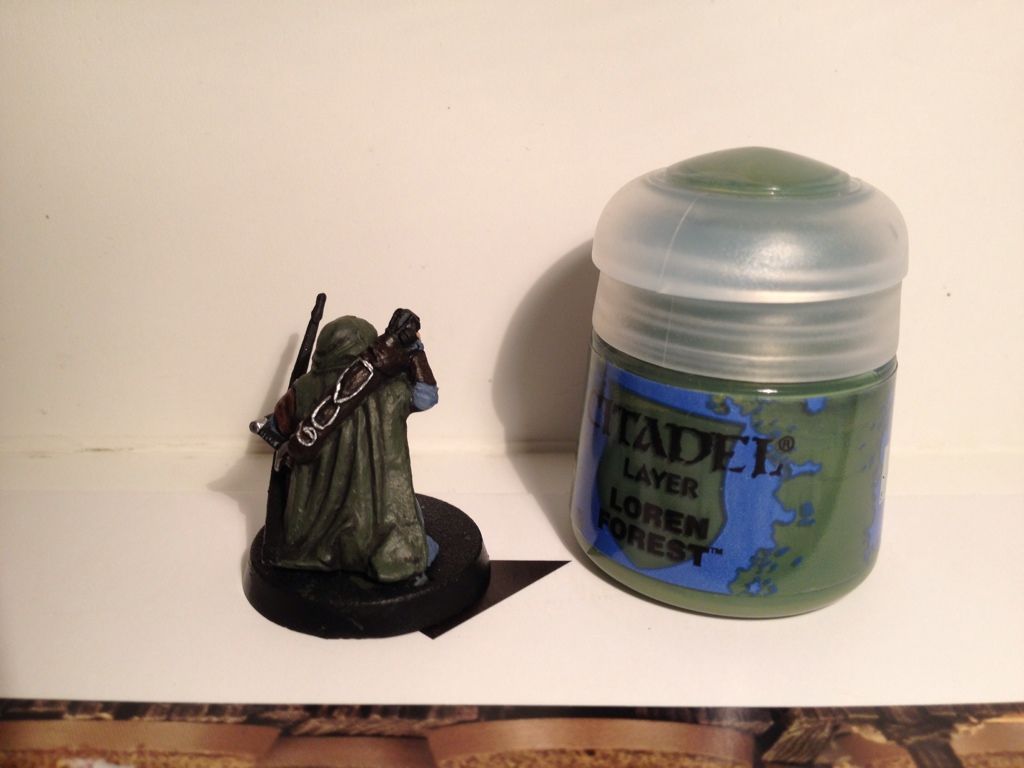
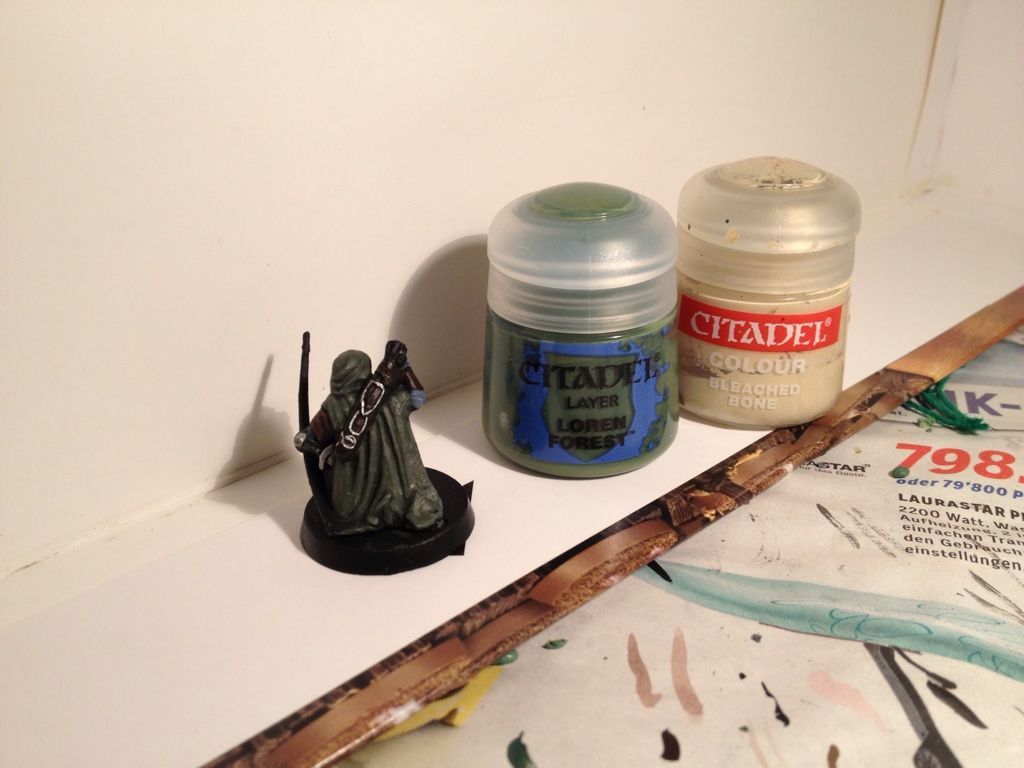
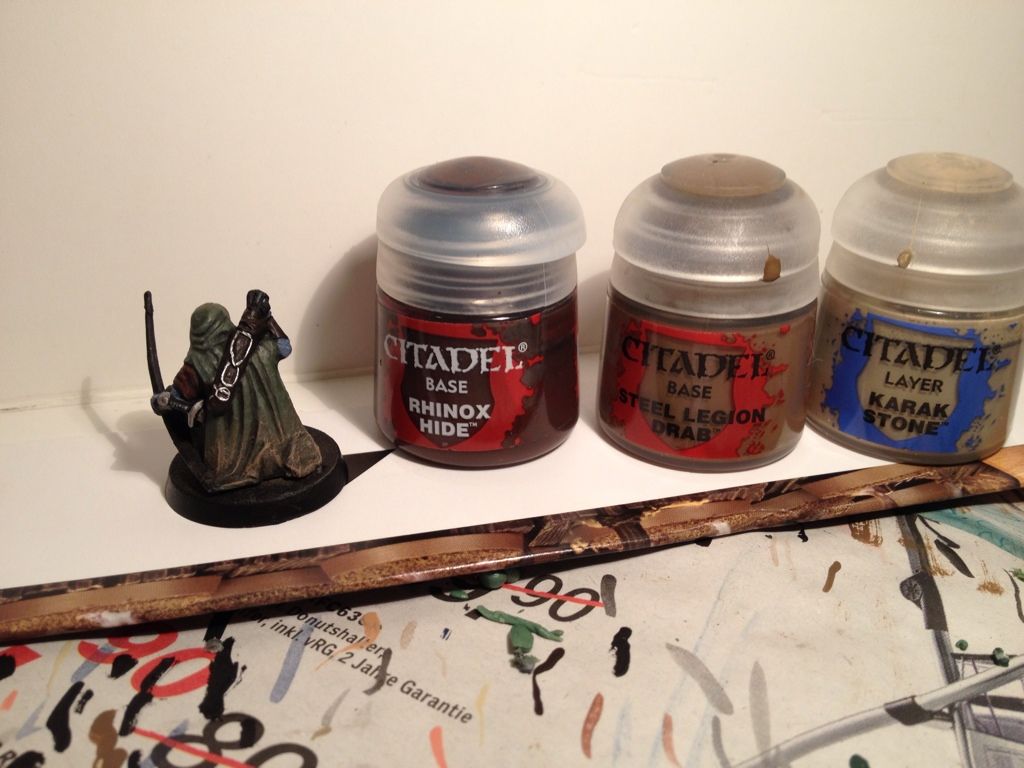
#1: Basecoat the whole area with a darkish colour, say Scorched Brown/Rhinox Hide. For additional shading, you could then wash it with Badab black/Nuln Oil.

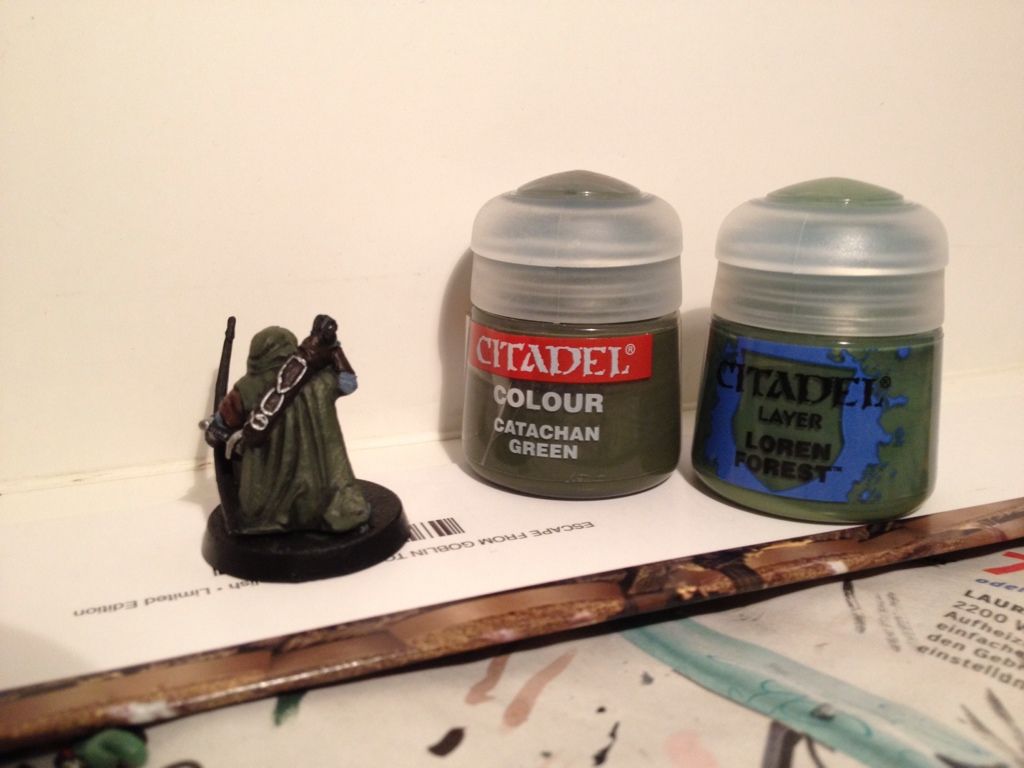
#2: Next, you want to choose a lighter tone of the base colour. Depending on what you're painting you might go towards a more orangey-light brown (like Bestial Brown) or maybe a paler brown like Graveyard Earth/Steel Legion Drab. Or, you could just add a bit of Bleached Bone to your base colour. Once you have the colour you like, mix it to the base colour and paint this mixture on the more elevated parts of the area (high folds, parts closer to the light source, etc.)

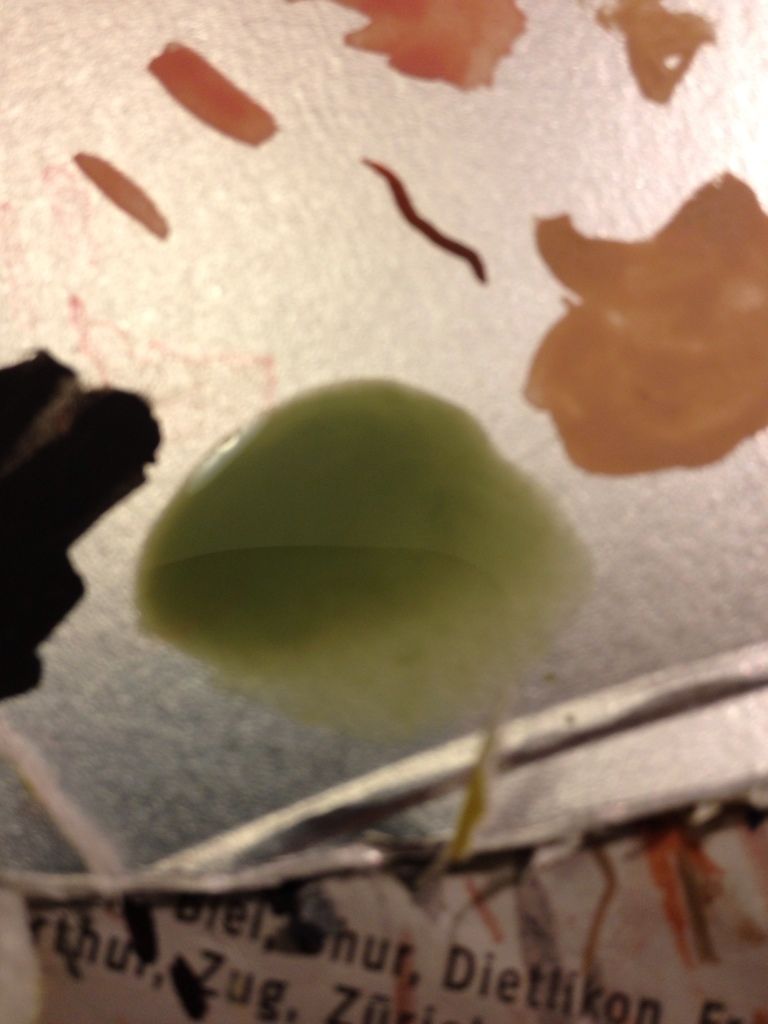
#3: this is the proper highlight stage. You can either use your highlighting colour straight from the pot (which is what I used to do), but for a much more 'professional' look, it really helps if you water the colour down (three drops of water usually suffices) till it is quite runny. Now, using a fine detail brush, pick up some paint on the brush and slowly drag it across the highest parts of the area (the tip of high folds, edges, etc). This leaves a faint trace of the paint and because it's so diluted it seems to 'flow' into the lower layers, giving it a more subtle highlight. Don't despair if your brush deposits too much paint; quickly brush your paintbrush off on a piece of kitchen roll and use the brush to 'suck' up the stray diluted paint droplet. Also, you may find that you'll need a few goes till you can really see the highlight, this is fine!

All I can really say is experiment! If you have a good picture in your mind of what you want, just go about it logically and don't be afraid of mixing paints! It took me a while before I did but now I never look back :)


Example: step one - Scorched Brown/Rhinox Hide, step two - Scorched B/Rhinox H, Bestial Brown 50:50, step three: watered down Bestial Brown highlights

Hope this helped! If you have trouble understanding what I mean I could probably make a picture guide tonight or tomorrow?

Author:  SMORG [ Mon Jan 14, 2013 7:35 pm ]
Post subject:  Re: Highlighting tips...

I have heaps of trouble shading metallics myself. I've found it easier to start blocking it out in Mithril and then washing it down to get a dull silver, Shining gold/Mithril mix as the base for gold.

Author:  Thermo [ Wed Jan 16, 2013 1:01 am ]
Post subject:  Re: Highlighting tips...

Thanks guys :)

Any more tips out there team? Me and SMORG need help with our metallics!

Author:  jay170788 [ Wed Jan 16, 2013 9:08 am ]
Post subject:  Re: Highlighting tips...

Thermo wrote:
Thanks guys :)

Any more tips out there team? Me and SMORG need help with our metallics!


Me too am going to try highlighting my galadhrim tonight, i might post pics if it looks acceptable.,..

Author:  Telchar [ Thu Jan 17, 2013 2:37 pm ]
Post subject:  Re: Highlighting tips...

Great guideline Monotone Matt! I'm going to try it tomorrow.

Author:  Monotone_Matt [ Thu Jan 17, 2013 2:49 pm ]
Post subject:  Re: Highlighting tips...

Would you like me to put up a quick guide with a few photos? I saw you were painting some Rangers of Gondor/Arnor, I could do a quick guide on their cloaks?

Author:  Thermo [ Thu Jan 17, 2013 3:08 pm ]
Post subject:  Re: Highlighting tips...

That would be legendary Matt :)

Author:  Monotone_Matt [ Thu Jan 17, 2013 3:11 pm ]
Post subject:  Re: Highlighting tips...

Green ok? :)

Author:  Monotone_Matt [ Thu Jan 17, 2013 6:36 pm ]
Post subject:  Re: Highlighting tips...

Hey guys! My simple photo guide turned out a bit longer than I expected, so I wrote a fully-fledged article :) Hope this helps you out guys!:

kb.php?a=244

Author:  Telchar [ Thu Jan 17, 2013 7:59 pm ]
Post subject:  Re: Highlighting tips...

I don't have sufficient permission to read it? I thought as a member you could read anything?

Author:  Monotone_Matt [ Thu Jan 17, 2013 8:00 pm ]
Post subject:  Re: Highlighting tips...

Ahhhh... I guess it needs to be approved by a moderator first! Sorry telchar, thought it was open to everyone :O

EDIT: I just copy-pasted the most relevant part - Enjoy! Also, I have additional photos if you need them :)

Step 1: Basecoat the whole area with a darkish colour, e.g. Catachan Green/Castellan Green. This is the base colour. As this model's cloak doesn't have many deep folds, I painted the whole cloak in the base colour. For very deep folds (such as Gandalf's robes), I recommend leaving the deepest parts black, as this is more realistic. Once the base colour has dried, wash with Badab Black/Nuln Oil for some shading.

Image

Image


Step 2: For this step, a lighter tone of the base colour is chosen and mixed 1:1 to the base colour to create the middle colour. In this example, Knarloc Green/Loren Forest was added to Catachan Green/Castellan Green. Alternatively, Bleached Bone/Ushabti Bone can be added to the base colour for a similar effect. The middle colour is then painted on the more elevated parts (the parts closer to the source of light), leaving the base colour and shading in the recesses.

Image


Step 3:For the highlighting colour, I often use the colour that was added to the base colour in step two, e.g. Knarloc Green/Loren Forest.

There are two ways to approach highlighting. The simplest way is to apply the highlight straight from the pot; however, doing so makes the highlight look unnaturally sharp and clashes with the background. By adding three drops of water to the highlighting colour (see pic below for a rough idea of the ideal consistency), a much more pleasing highlight, that blends into the underlying colours, can be achieved.

Image

Using a fine detail brush, the diluted highlight colour is slowly dragged along the most elevated parts, such as the tip of high folds and edges; places that the light would hit the strongest. The diluted paint leaves a faint trace that 'flows' into the lower layers, giving a more subtle highlight. Don't despair if your brush deposits too much paint; quickly brush your paintbrush off on a piece of kitchen roll and use the brush to 'suck' up the stray diluted paint droplet. Also, it may take a few passes before the highlight is visible, so it's worth going over a few times.

Image

As you can see, the cloak now has subtle shading and highlighting, which I'm sure is enough for most painters. If the highlight is too subtle for certain tastes, an additional highlight can be added...


Step 4: Using the same techniques as in step 3, an additional highlight can be added to further simulate the effect of light on a model. To create a lighter highlight, I mix Bleached Bone/Ushabti Bone 1:1 with the highlighting colour (Knarloc Green/Loren Forest) and apply as before:

Image

There we have it! Using three (okay, four) simple steps a decent light effect can be achieved by anyone.


The steps used in this guide can be used for pretty much all sorts of highlighting, even metals. Just remember dark colour - middle colour - light colour and you can't go wrong!

Image

Weathering effects can also be created using the basics of highlighting: Just drybrush Scorched Brown/Rhinox Hide, Graveyard Earth/Steel Legion Drab and Kommando Khaki/Karak Stone to add the finishing touches to your realistic, well-highlighted cloak!

Author:  Monotone_Matt [ Fri Jan 18, 2013 8:08 am ]
Post subject:  Re: Highlighting tips...

Did it help at all, Telchar?

Author:  Crucifer [ Fri Jan 18, 2013 9:30 pm ]
Post subject:  Re: Highlighting tips...

I found it really hard to highlight metallics aswell. You could try doing NMM it takes a LOT of time to make it look good, bit if fond proper it looks really good. Otherwise I got nothing more to add then what other people have said. Try water to paint or use a really thin layer of paint. GLHF with your Grey Company :)

Author:  Monotone_Matt [ Tue Jan 22, 2013 9:25 am ]
Post subject:  Re: Highlighting tips...

So did that guide help you out at all, Thermo? I put a bit of time into it, would be nice to at least know if it was useful :P

Author:  Thermo [ Tue Jan 22, 2013 12:26 pm ]
Post subject:  Re: Highlighting tips...

Haha sorry Mat, yes, very useful! Did you see the WIP thread?

Been trying to spend more time doing the models and less time talking about doing them!

Any top tips for basing?

Thanks again buddy!

Author:  Monotone_Matt [ Tue Jan 22, 2013 12:32 pm ]
Post subject:  Re: Highlighting tips...

Well what sorta look do you want? A foresty look or more an open plain look?

Author:  Thermo [ Tue Jan 22, 2013 3:33 pm ]
Post subject:  Re: Highlighting tips...

Monotone_Matt wrote:
Well what sorta look do you want? A foresty look or more an open plain look?


I've gone for sort of rocky moorland... so have some small ground pebble stuff and some dried moss (bought)... so far have PVA'd the rocks to the bases and then put an additional layer of PVA over the top to set it. Should I apply a wash and drybrush to highlight before adding the moss??

Thanks guys.

Author:  Monotone_Matt [ Tue Jan 22, 2013 3:45 pm ]
Post subject:  Re: Highlighting tips...

That sounds like a good idea, you don't want paint on your moss! Pics?

Author:  Thermo [ Tue Jan 22, 2013 4:37 pm ]
Post subject:  Re: Highlighting tips...

Monotone_Matt wrote:
That sounds like a good idea, you don't want paint on your moss! Pics?


Take a glance at the WIP in the other thread and you can see an example one that currently has no wash, drybrushing or moss! But will try get them finished up tonight :) thanks for following this and giving your support.

Top notch :yay:

Page 1 of 1 All times are UTC
Powered by phpBB © 2000, 2002, 2005, 2007 phpBB Group
http://www.phpbb.com/