The One Ring
https://ww.one-ring.co.uk/

Sewers of Osgiliath
https://ww.one-ring.co.uk/viewtopic.php?f=7&t=32415
Page 1 of 1

Author:  GreatKhanArtist [ Wed Aug 24, 2016 5:25 pm ]
Post subject:  Sewers of Osgiliath

In BGiME #25 there is a wonderful "what if" scenario involving the hobbits trying to escape the city via the sewers. This magazine is pretty much centered on this event, and there is a neat little mini game with cycling terrain to play with your WoMT and some orcs. I recently decided with the hot July weather in Alberta to cast some plaster blocks and go to town on the idea.
Image

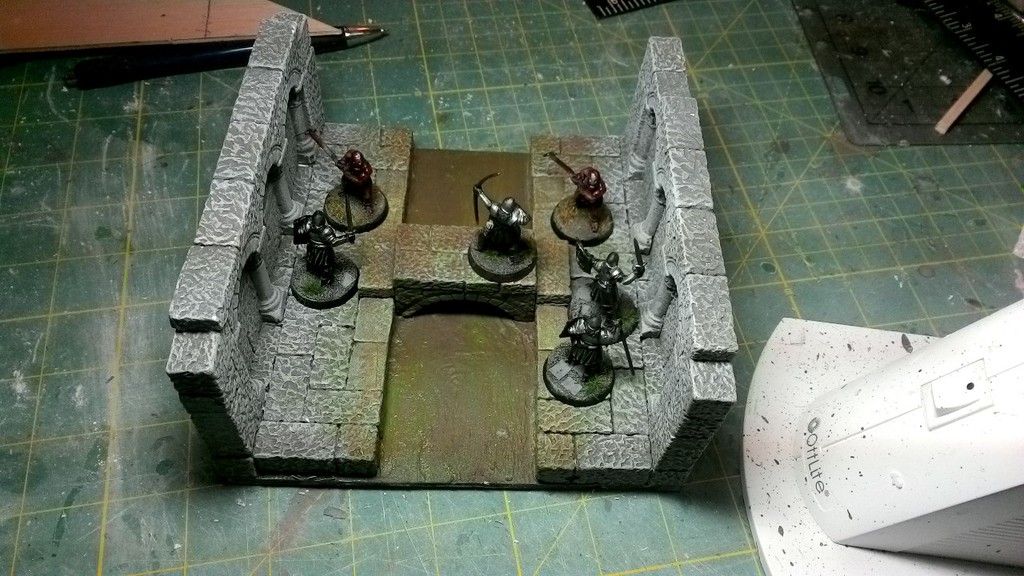
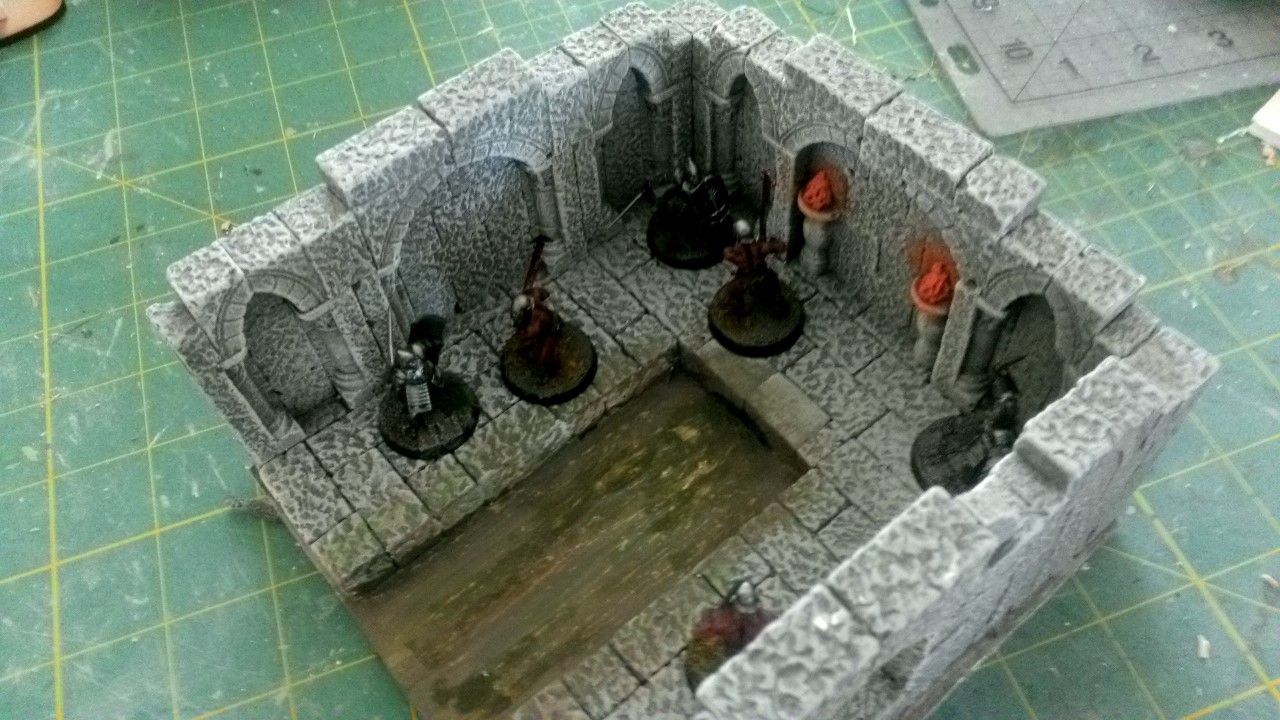
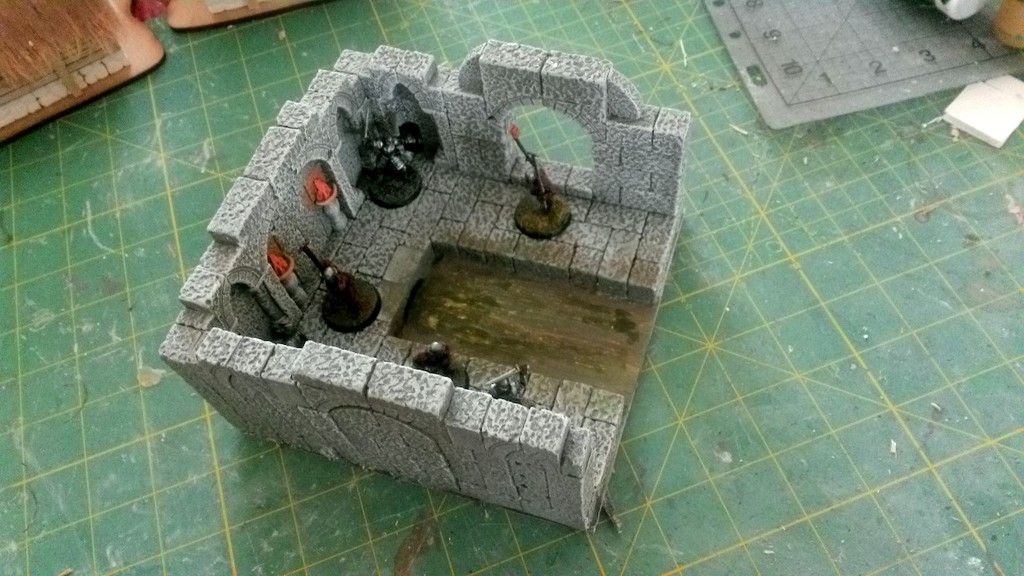
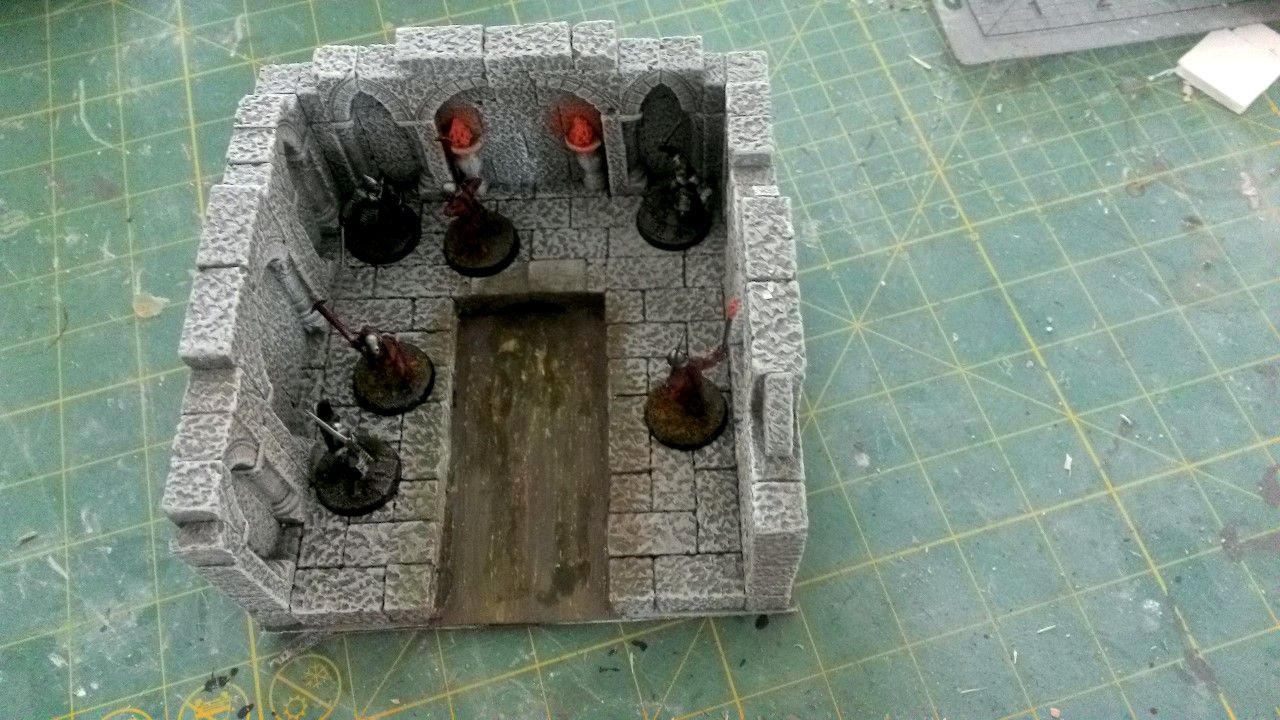
Here you can see my entrance. (I think the water might need repainting, too many white spots) This was built using primarily Hirst Arts basic dungeon builder mold and basic blocks. (The torches are off another mold, I think.) The whole thing was cast with cheap PoP, glued with wood glue (which gets in the holes nicely) and painted with dollar store acrylics. I had fun staging some models. The instructions used were from Hirst Arts basic dungeon build and basic gothic arena. I had some fun fitting them together on wax paper (the glue doesn't stick to it, brilliant!) before final assembly. The sewer waste is drywall gap filler. Apply in broad strokes to avoid having the water look too fast flowing.

Not only were these fun in their own right, but they are a nice practice of how to get build using these molds for the future ruins above Osgiliath and other Gondor buildings. They are 6x6", using Imperial measurements this time because Hirst Arts castings are all in inches.
Image

Image

Looking forward to finishing enough for the game!
Author:  DaveT [ Thu Aug 25, 2016 1:33 am ]
Post subject:  Re: Sewers of Osgiliath

Really nice! I'd love to see more pictures as you progress.

Author:  Nevinsrip [ Thu Aug 25, 2016 7:14 am ]
Post subject:  Re: Sewers of Osgiliath

Neat idea. It's great to see people think outside the norm, here.

Author:  GreatKhanArtist [ Fri Sep 30, 2016 6:05 pm ]
Post subject:  Re: Sewers of Osgiliath

And we're proceeding nicely through the sewers, making a slow, steady escape.

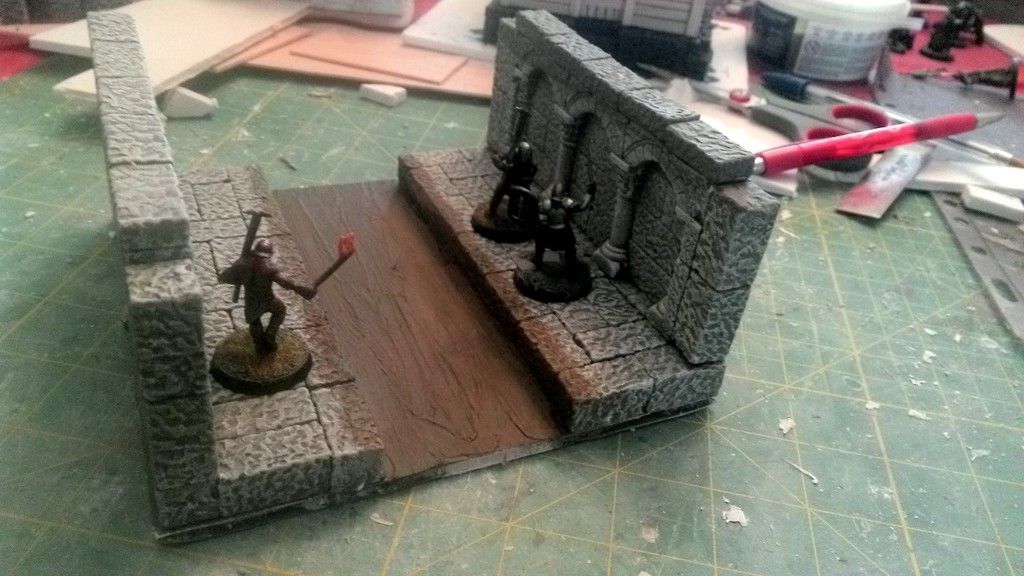
Here we have the first piece I did, one of what will be four or more straight pieces. Very simple, quick to assemble. Straight out of the Hirst Arts dungeon builder instructions for simple dungeons.

Image

This is the second such straight section. I'm playing around with some ideas to vary them up, I could have 4 identical sections, but that's boring. I put a stone bridge over this one. All the arches that make up the walls and the bridge are the same size. They also make up the portals from which the sewage flows on the floor. I do have different arches and am hoping to play with these in future pieces. I really like how well this piece photographed, it shows the true colours of the water very nicely.

Image

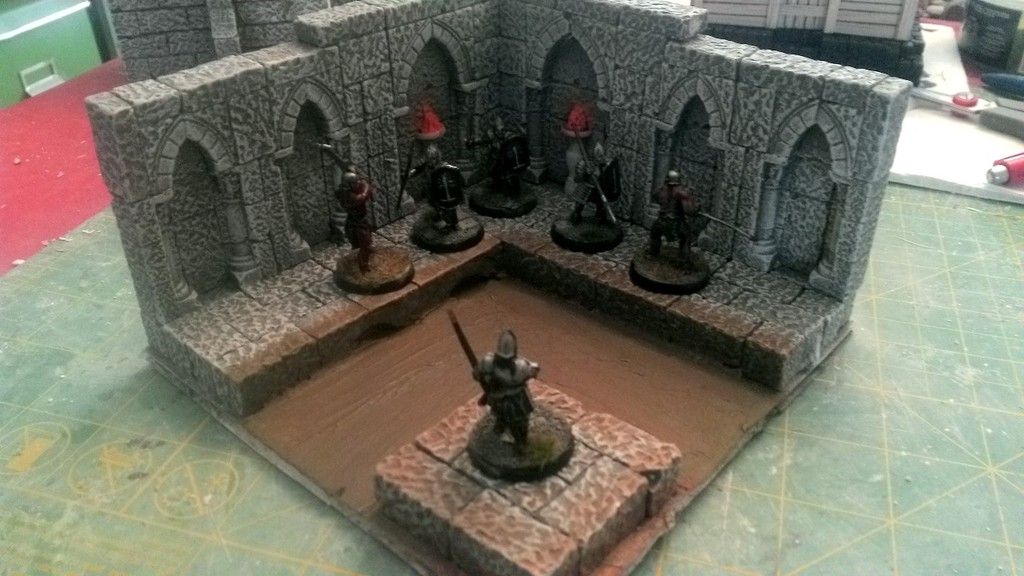
Finally, the first of 4 corner pieces. Yes, I know the "island" in the corner looks naked, but it has to be this way to line up with the other pieces. Here I had some fun taking sections of the Hirst Arts dungeon builder recommended pieces and arranging them to fit my 6x6 grid. Lots of repositioning, it took a long time to work out, but I really like it. 3 more with sight variations to go!

Image

Future straight sections will include floating debris, like crates, etc. and a piece of broken wall that has been shorn up with sticks. I like the idea of rubble for slowing movement. I might do a section with some bones or one with drainage holes in the wall for sewage to run out of. I'd love to buy some rats for scene fillers; I should be able to find some Skaven bits. I still have to do the exit, which I'm planning to do as a storeroom beneath a house and the crossroads, which will be a challenge to make look better than 4 islands. I'm hoping to make some wide arches for this part.

Author:  GreatKhanArtist [ Fri Sep 30, 2016 6:08 pm ]
Post subject:  Re: Sewers of Osgiliath

In the background is a tantillizing picture of my other big project, the modular fortress including the Tower of Power, also modular. Stay tuned for more!

Author:  Oldman Willow [ Fri Sep 30, 2016 8:56 pm ]
Post subject:  Re: Sewers of Osgiliath

Well done.

Author:  Scib [ Fri Sep 30, 2016 9:03 pm ]
Post subject:  Re: Sewers of Osgiliath

I really like the modular nature of this. Again in Bgime they have used the same principle but for moria which I am thinking of trying for myself

Author:  DaveT [ Fri Sep 30, 2016 9:19 pm ]
Post subject:  Re: Sewers of Osgiliath

Looks great!

Author:  GreatKhanArtist [ Sat Oct 01, 2016 5:15 am ]
Post subject:  Re: Sewers of Osgiliath

Scib wrote:
I really like the modular nature of this. Again in Bgime they have used the same principle but for moria which I am thinking of trying for myself


Thanks for the kind words everyone! :oops:

This is certainly an interesting idea. I'm wondering what issue(s) you're referencing. Modular Balin's tomb could be so fun, I might have to buy some Moria molds from that other maker and have a go. I think I'd go with the strict dungeon builder idea and some kind of mini rules for placing walls. Would be a great article for a future SBG mag too.

Edit: Mapper in his "Leaving Moria" topic has made some Keebler Moria dungeons that are quite modular. I'd encourage you to check them out!

Author:  Nevinsrip [ Sat Oct 01, 2016 6:45 am ]
Post subject:  Re: Sewers of Osgiliath

Nicely done! Great idea and modular is the way to go. I like it.

I have a Hirst Amon Hen that needs painting.
I was going to use Woodlands Scenics pigments to stain it.
It's not plaster of paris, but dental plaster.
I'm not sure how that will absorb the pigments.

Willow (or anyone) have any experience with staining dental plaster?

K, How did you do yours?
I can use cheap acrylic paints, if you think the results are warranted.

I also got a 10 pound bag of assorted cast bricks from the same guy that I should do something with. I've been thinking about Arnor. Maybe something there.

Author:  GreatKhanArtist [ Sat Oct 01, 2016 3:02 pm ]
Post subject:  Re: Sewers of Osgiliath

What's really nice about that acrylic is how well it covers carpenter's glue. Water based doesn't like to cover it well. I don't imagine that stain would cover carpenter's glue well either, but if you aren't prone to sticky fingers, give it a go. Usually I give my pieces a really watered down paint job to get in all the joints. When that is dry, I give them a liberal coating of med grey. The sewer water got this as a basecoat too. Then I just go to town on drybrushing. The secret is to start dark and work your way up to lightest shades. Mine just get light grey and white. The bridge (in the "over the river Anduin" topic) got a paint store mixed equivalent of dheneb stone and then a drybrush of white. Much lighter, I think it looks like the white city.

Shipping is stupidly expensive in Canada, so I just go to the hardware and use regular PoP. I have used Woodland Scenics hydrocal, which stains nicely. Basically, anything pourous would stain well, I think. WS uses it with a sponge or sponge brush on rocks for a really nice natural blend.

Pick a sample piece and try staining it. My only qualms would be with it going there and picking out where the seams are, especially if you use a brush. If you want sample pieces, I have 4L of them, just pay shipping and they're yours.

Author:  Oldman Willow [ Sat Oct 01, 2016 4:15 pm ]
Post subject:  Re: Sewers of Osgiliath

I have used Woodland Scenic Pigments with Hirst Arts blocks. The only way it works well is if you stain the blocks before you glue them together. PVA will seal the blocks.The pigments don't cover evenly because the glue squeezes out between the blocks. I can not seem to keep the PVA off of my fingers. The pigments will not cover the fingerprints.

Image

I used the Woodland Scenic Pigments on the cast rocks and as a wash on the blocks. The base coat of the stairs was a custom color house paint that covers the paintable latex calk I often use as filler. I used DryWall filler for the large rock casts as glue. The pigments will stain the dry wall filler that squeezes out between the rock casts.

Image

This is an early stage photo of the staining process.

Image

You can get some interesting effects with the stain.

Image

You can also paint over the pigment and dry brush it with craft paint.

Author:  Scib [ Sat Oct 01, 2016 4:34 pm ]
Post subject:  Re: Sewers of Osgiliath

GreatKhanArtist wrote:
This is certainly an interesting idea. I'm wondering what issue(s) you're referencing. Modular Balin's tomb could be so fun, I might have to buy some Moria molds from that other maker and have a go. I think I'd go with the strict dungeon builder idea and some kind of mini rules for placing walls. Would be a great article for a future SBG mag too.

Edit: Mapper in his "Leaving Moria" topic has made some Keebler Moria dungeons that are quite modular. I'd encourage you to check them out!


Issues 83 and 84, they have some good ideas in there

Author:  Oldman Willow [ Sat Oct 01, 2016 4:53 pm ]
Post subject:  Re: Sewers of Osgiliath

Nevinsrip wrote:
Nicely done! Great idea and modular is the way to go. I like it.

I have a Hirst Amon Hen that needs painting.
I was going to use Woodlands Scenics pigments to stain it.
It's not plaster of paris, but dental plaster.
I'm not sure how that will absorb the pigments.

Willow (or anyone) have any experience with staining dental plaster?

K, How did you do yours?
I can use cheap acrylic paints, if you think the results are warranted.

I also got a 10 pound bag of assorted cast bricks from the same guy that I should do something with. I've been thinking about Arnor. Maybe something there.


There will be slight differences. The finer grained harder products don't absorb as much pigment.The WS products were designed for Hydrocal a better grade than plaster but not as hard as dental stone and Hydrostone.

I use a black base coat and dry brush with craft paints.

Image

Image

When the first coat is dry you will need to fill any imperfections and find any of the white spots that you may have missed.

Author:  GreatKhanArtist [ Mon Oct 31, 2016 12:10 am ]
Post subject:  Re: Sewers of Osgiliath

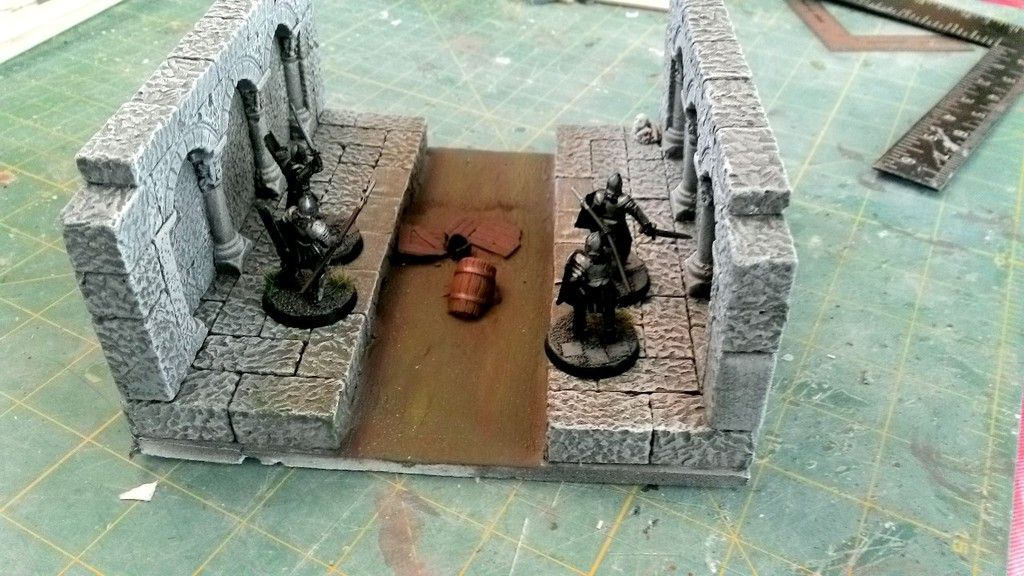
The latest offering in the modular Sewers series is my second to last planned straight section. Not all my castings work out, but in this case, it's for the better! I took the broken barrels and crates from my cavern accessories Hirst Arts mold and "glued" them with drywall gap filler to the board.

For those who are interested, my boards are painted with medium grey, drybrushed with light grey then white. The water is painted slightly thinned chocolate brown over grey. Thinned greens are them used. I use a mixture of GW greens, most of which are typically associated with Warhammer wood elves.

Image

Author:  DaveT [ Mon Oct 31, 2016 9:31 pm ]
Post subject:  Re: Sewers of Osgiliath

Very nice! The debris looks great.

How far along are you in terms of number of sections completed vs how many you are going to make?

Author:  GreatKhanArtist [ Mon Oct 31, 2016 10:21 pm ]
Post subject:  Re: Sewers of Osgiliath

One more straight section, one more corner section, an exit and two T sections are what the magazine recommends. If I buy Frostgrave, I will expand it with unique rooms and it will become a dungeon, not a sewer.

Author:  infinateremains [ Tue Nov 01, 2016 9:39 am ]
Post subject:  Re: Sewers of Osgiliath

Have you seen the sewer sections available from zealot minis?

Update: I have ordered one straight section today to see how it measures up. I will let you all know once I receive them how they look with some minis on.

Author:  Oldman Willow [ Tue Nov 01, 2016 1:36 pm ]
Post subject:  Re: Sewers of Osgiliath

infinateremains wrote:
Have you seen the sewer sections available from zealot minis?

I took part in the kickstarter. I will check out the sewers 8)

Author:  GreatKhanArtist [ Mon Jun 05, 2017 3:07 am ]
Post subject:  Re: Sewers of Osgiliath

A long time coming, but the cross...roads? and the straight section are finished. The cross isn't worth photographing. It's just a + of river with squares on each side. I wanted to make some arches over the whole thing, but nothing fits it. :x

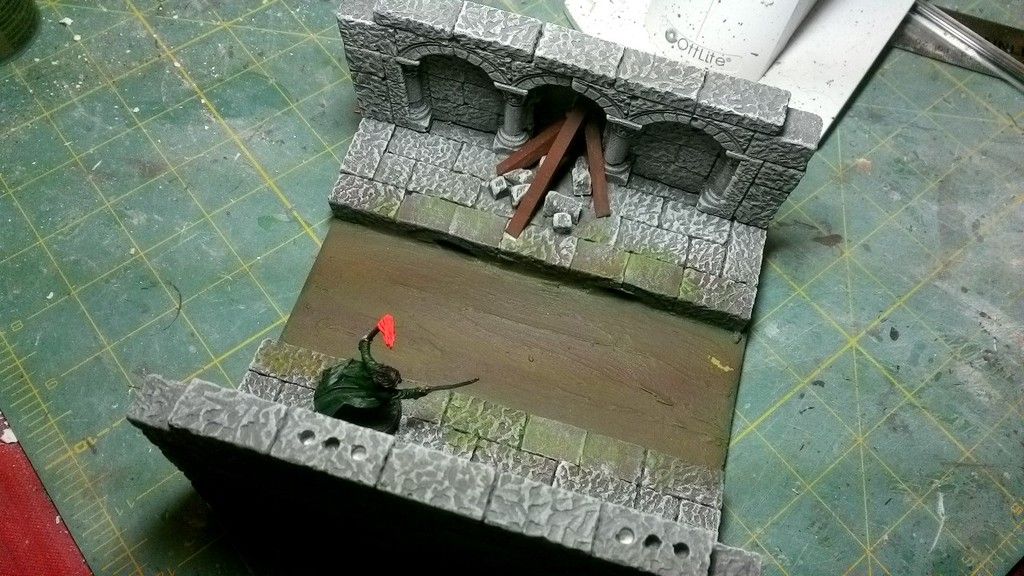
This is the final straight section. I decided if you were underground, what could be scarier than the after effects of the berserkers in the other photos? Just chunks of square doweling from the hardware store painted with dollar store brown and drybrushed with an assortment of citadel browns. The hole itself is cardboard and drywall gap filler. An unfinished Aragorn for scale.

Image

Page 1 of 1 All times are UTC
Powered by phpBB © 2000, 2002, 2005, 2007 phpBB Group
http://www.phpbb.com/